Monday, 13 September 2021

Breaking the Bathroom - Part 2

Welcome to part 2 of Breaking the Bathroom. If you missed part 1, you can find it here.

I found a tile I liked and decided to order it. It is beautiful! I love it.

Turns out the only tile i liked was on back order and wouldn't be in until August. Being that it was June, I had two months to wait for my order to come in. A small part of me died inside. 

Naturally, I can't sit still for long, so I started a new project to complement the tile once it came in: A mirror frame!


I started by installing a half inch wood trim around the existing medicine cabinet, to allow for a buffer around the operable mirrored doors. It perfectly matched the depth of the cabinet.


Next, I bought some lumber and started to measure out my sides to match the height of the existing mirror cabinet, plus the half inch trim on top and bottom.


Then cut them to size.


Next, I sanded them twice with two different grits to make them nice and smooth.


Now with a top and bottom rail, and 4 vertical rails for my frame, I was ready to stain them to match the existing lower cabinet, which I love so much.


The first coat ended up darker and browner than I'd have liked so I had to had to go back and get some cherry to warm and redden it.


I used my corner clamp to screw and glue my pre-drilled holes and assemble my frame.


I took the frame inside, put it up against the mirror for a test fit and to double check the location of the inner rails. This ensures a snug fit around the medicine cabinet. Then I filled all of the holes with wood filler, re-stained them.


I'm not actually going to show you the finished product yet until the tile is complete... but here's a sneak peak of the door pull I put on the mirror to ensure we could still open the medicine cabinet. 

See more tomorrow! I promise...

Sunday, 12 September 2021

Breaking the Bathroom

I kept looking at this 55 year old backsplash tile, thinking, "Surely the mortar behind the tile would be old and crumbly by now... right?" I kept looking at it. Then one night 3 weeks later, I tapped it with a hammer. I tapped it, and the corner just popped right off.

I had a box of beautiful 2x8 white Bellavita tile that I purchased over a year earlier, and I just hadn't had the time to get on with it.


So after I put my kid to bed, I started tapping away. Carefully pulling the tile away from the wall. That first tile was so easy. 


In fact, that whole first row was great to take off!


The problem is, by the time I got to the corner, the tiles were no longer easy to remove. How are they this stuck on after 55 years?


It became very slow going after this. 


It got to the point where I had to hype myself up and say, "only 20 more tiles left, only 19 more tiles left...". Why? Why did I do this to myself?


I finally got it all off, and set to repairing the wall with a skim coat.


After it dried, I sanded it smooth, and opened up my box of tile ready to get going on the tiling.


Public Service Announcement: Always open your tile when you pick it up to ensure that all of the boxes are indeed the same colour. Hello full box of charcoal. How did you get in there with my order of white tiles?

So after contacting the distributor, I discovered that this tile is discontinued. 
All I could do at that point was figure out what to use instead, and cover the whole thing with plastic until I did.


How's that for a cliff-hanger? Stay tuned for the next installment of Breaking the Bathroom, tomorrow.

Wednesday, 4 August 2021

Mini Project: Garage Numbers

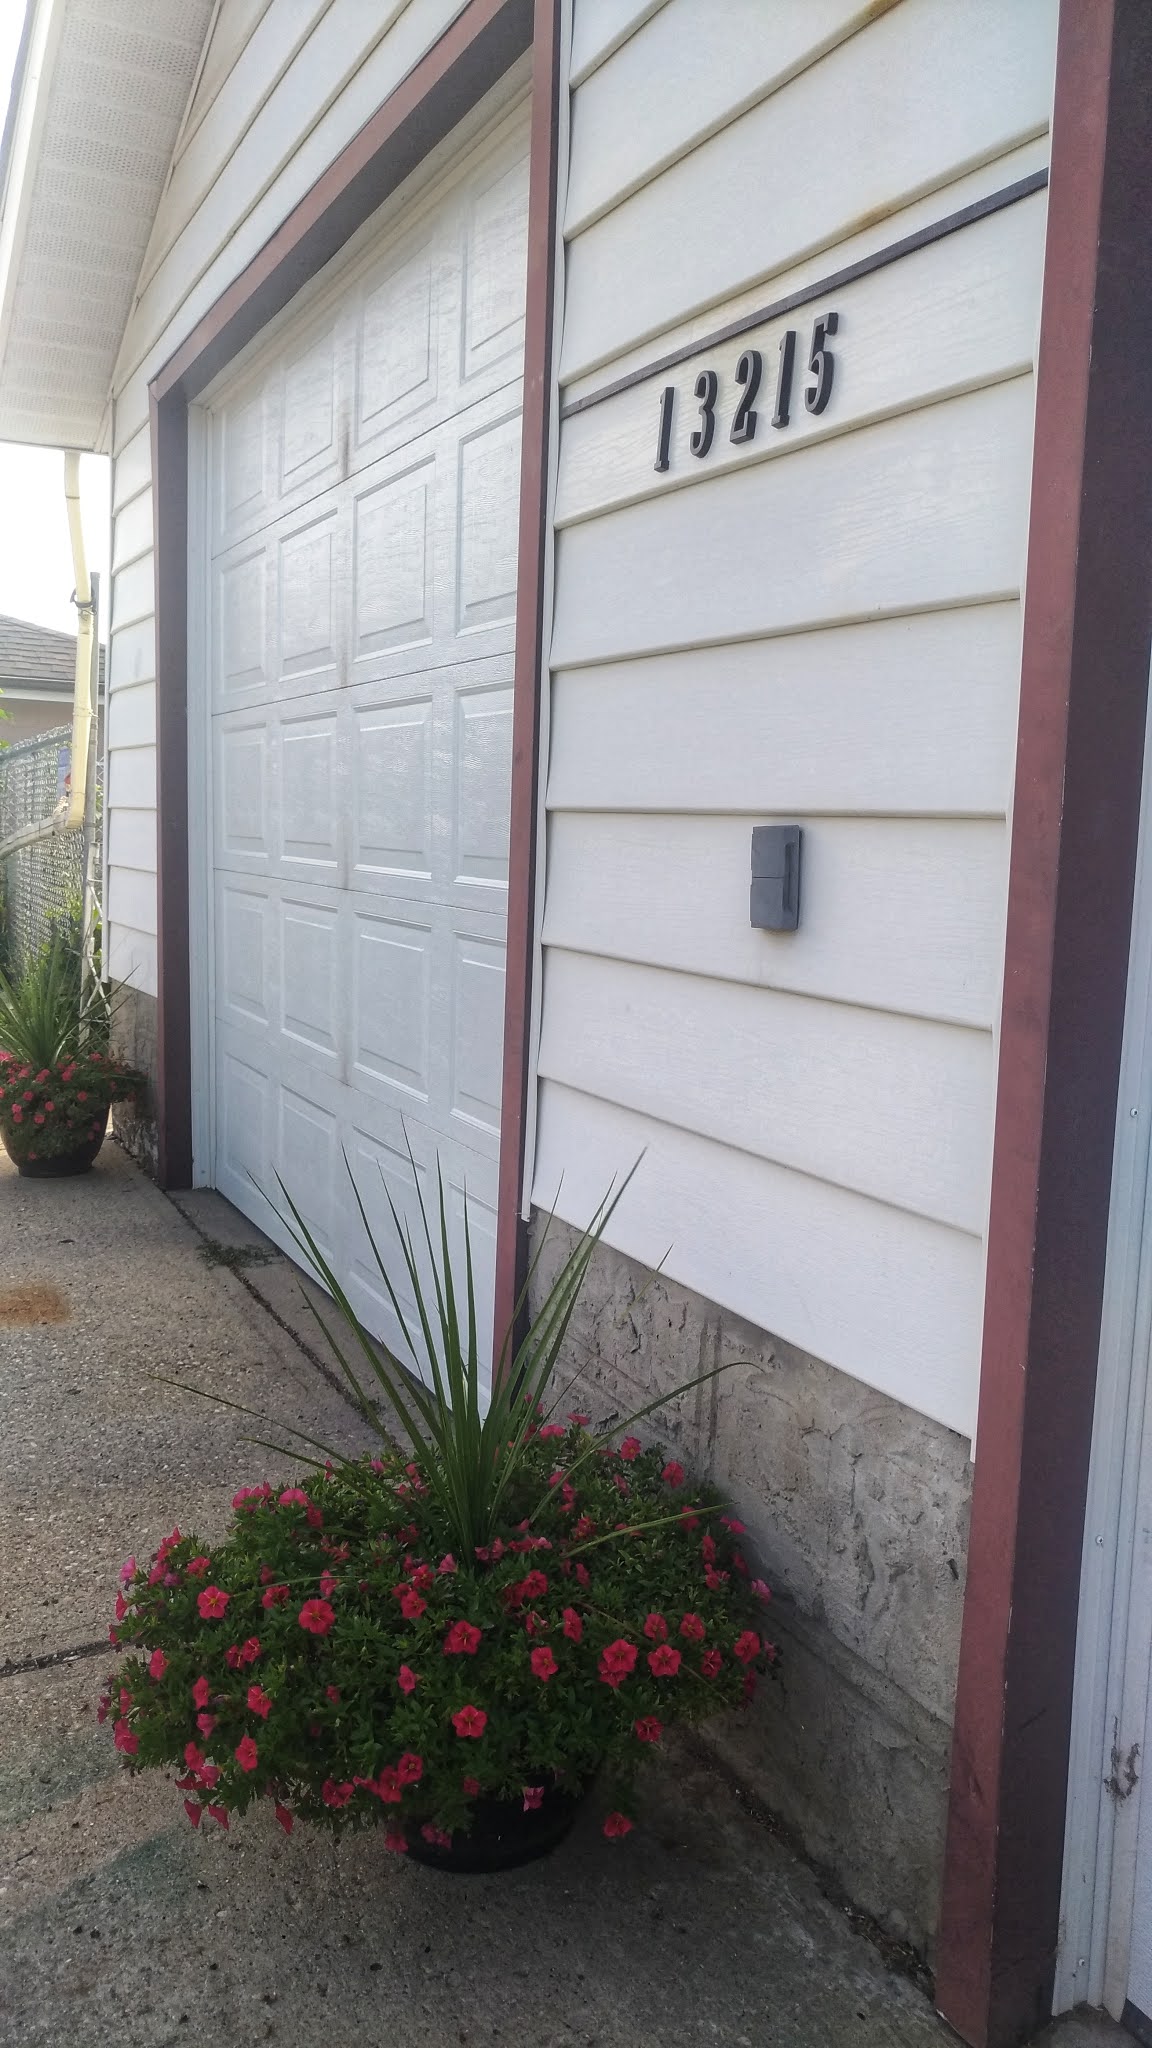
I finally got sick of looking at this sorry excuse for house numbers. It is actually in the back alley, on the garage, so you don't see it from the front of the house, but this is Edmonton, and we have a whole network of back alleys.


Each time I drive up and park my car in the garage, I am reminded of this eye-sore, but then immediately forget about it.


Not today, Satan!! I bought some new 4", peel'n'stick, black, metal numbers from Home Depot and brought them home.


Once I removed the screws from the old number plate, I knew I would have to seal the holes, which wouldn't look great. 


That is when I got a sneaky, simple idea. I used one of the 1/4" trim lengths that I had laying around, and painted it black.


Then I caulked the screw holes, and installed the new black trim over it to create a visual anchor for the rest of the numbers. 


Th rest was simple: Wash the surface with mineral spirits; measure off the distance from each side; stick the 1 and 5 first followed by the 2 in the middle. 


The only downside of upgrading your house numbers is that it makes you side eye everything else... Like that brown trim. I'll get to it soon. Thank you for stopping by!!

Sunday, 20 June 2021

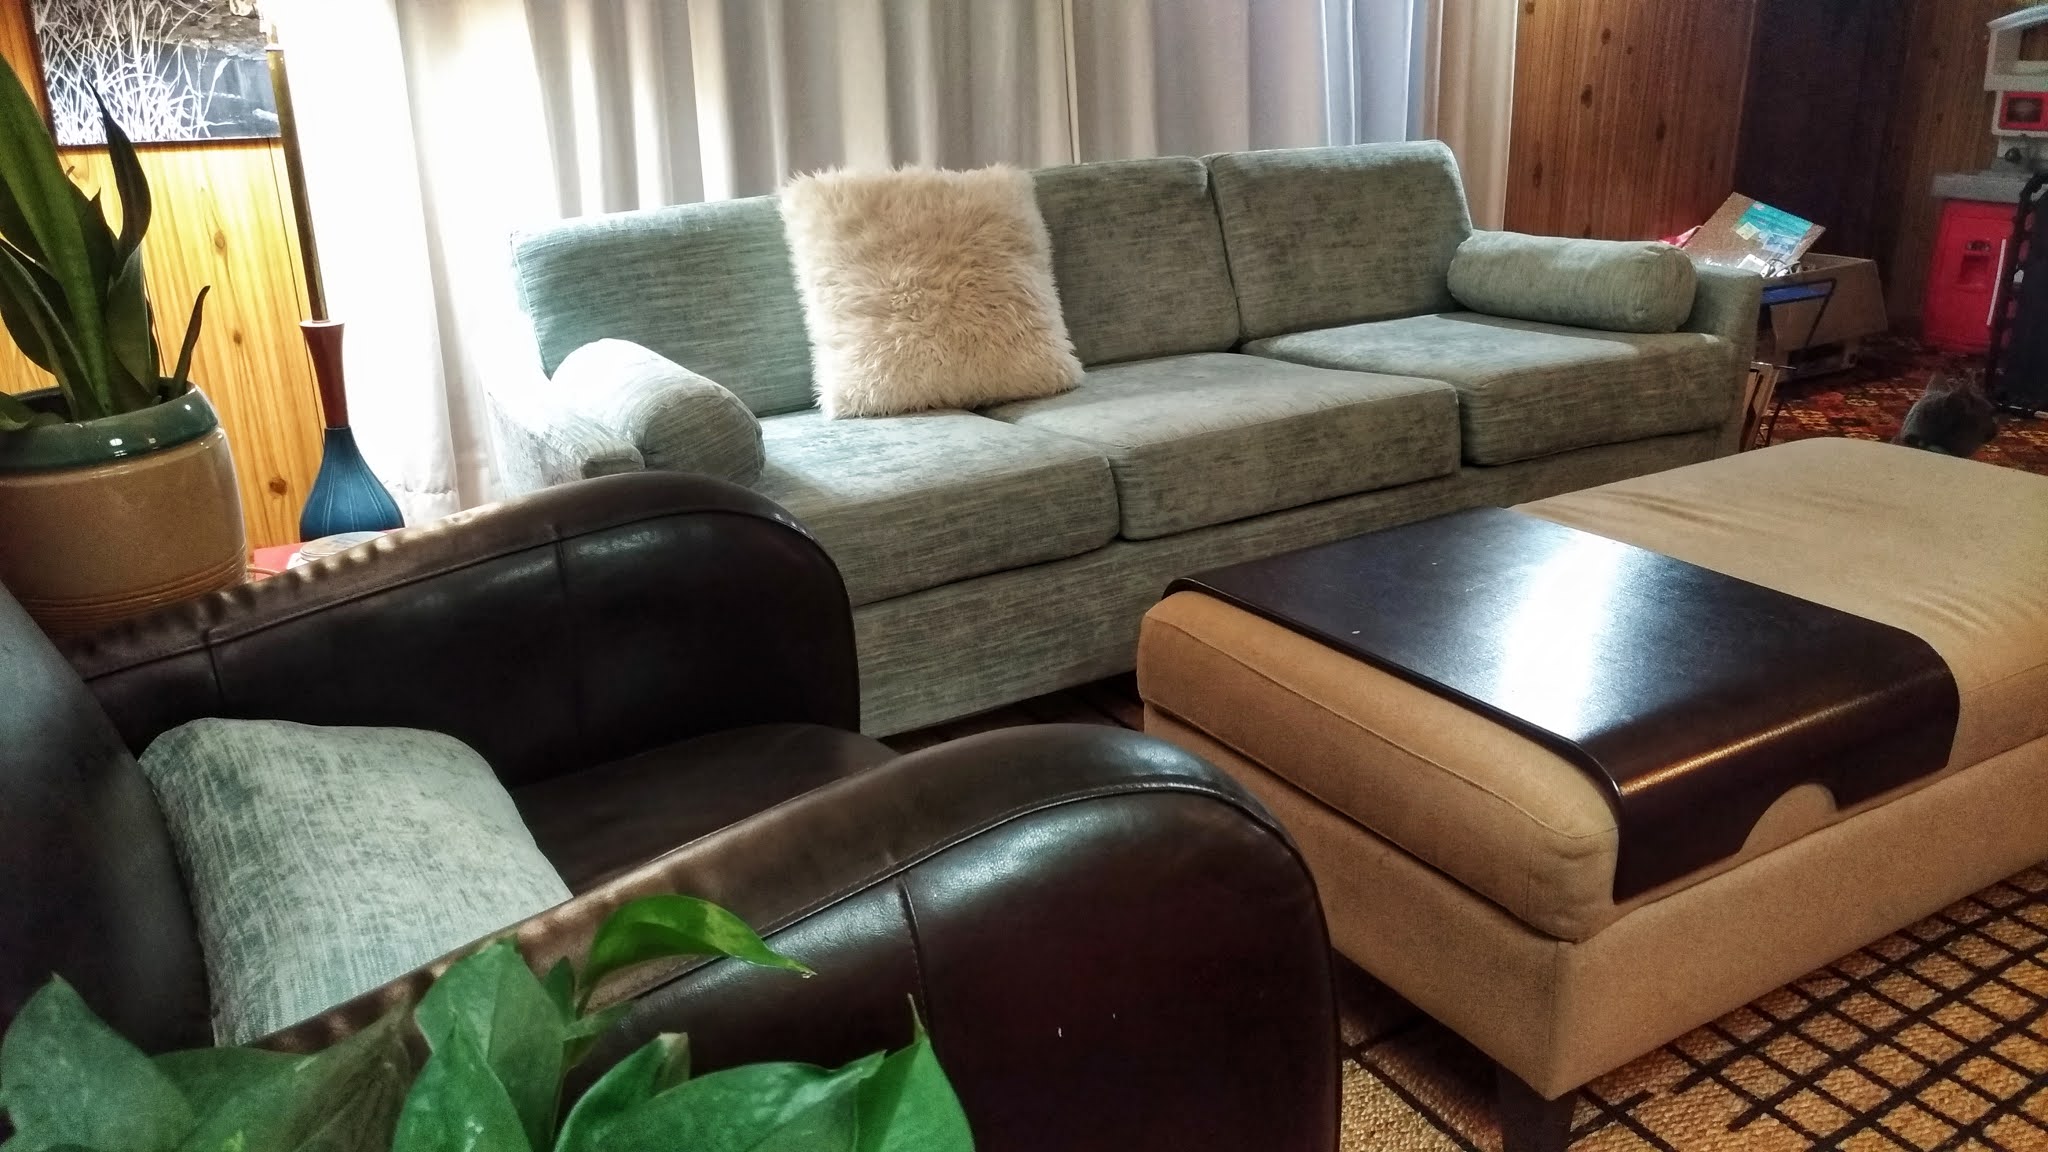
Sofa Save: DIY Upholstery

We acquired this sofa a couple of years ago. It was in good condition and sat in the waiting area of a gymnastics center. And it was almost free!


I got it specifically to reupholster, as it had the simple mid-century lines I was looking for.

BEFORE
AFTER

In the meantime, we put it in the TV room. It was so saggy that it gave me back pain to sit on it for too long. Once I was finally ready to reupholster it, the first thing I did was take off the bottom and check that the structure and springs were sound.


I was surprised to find that everything was a-okay!! The cat began his intense supervision of the whole process. Good frame means that sagging comes from the cushions, which is actually a much easier fix.

Tools/supplies:
-butter knife (for staple removal)
-pliers (for staple removal)
-staple gun
-3/8" staples
-fabric scissors
-upholstery machine needle
-zipper foot
-new upholstery fabric (about $250 CAD)
-matching upholstery thread
-zipper (I reused/repurposed mine)
-new foam cushions (about $275 CAD from Eversoft)

 
I removed the dust ruffle for a much sleeker look.


Then I removed the back panel and put it aside to use as a template for the new back panel. I also reserved the two side metal tack strips for reuse later.


The back has some curves at each corner, so that portion was adhered with special tack strips. I removed them, and put them aside as well.


With the back panel off, I began using scissors to remove the piping from the arms.


I draped my new fabric over the front of the sofa. Starting at the front bottom, I began stapling the new fabric in place.


I continued by pulling the fabric through the space between the seat and the back, pulling it tight and stapling it at the back. The same applies for the seat back. The new fabric was stapled at the back and then pushed through the space and also stapled. 

I forgot to take a photos of the arms, but they are a simple two piece, that I pinned to form the arm. Once I had my shape perfect, I sewed it, then turned it right-side in and put it on the opposite arm. The bottoms are then pushed down into the crevices and stapled within.


The cat seemed to enjoy the new fabric, even without the cushion on it. The final step is to cover all of the exposed staples with the back panel. 


The original cardboard tackstrip was basically disintegrating, so instead, I used old business cards as my tack strip. See! They come in handy for something! Once the fabric with tack strip is in place, you pull it down over the back, and you've created a clean line at the top of your panel.


The metal tack strips that were reserved during the removal, are then put on each side and tapped in with a rubber mallet. Then the bottom is pulled tight and stapled underneath.

I put the reserved bottom (crumb catcher) back on the sofa bottom, screwed the legs back on, and flipped it right side up.


With the frame now fully upholstered, I turned my attention to the new cushions. We went with a new medium-firm 6" cushion. As you can see, it is much thicker than the original 4" cushions. When ordering new cushions, measure you existing cushion from seam to seam, then add an inch to it. This will give you the nice curve to your cushions. 


I created the new cushion covers by pinning the top, bottom and side pieces to one another, and I reused the zipper from each existing cushion in the new cushions.


With the old seat cushions no longer being used, I cut them down, and used them for the new back cushions, taking them from 3" to 4" back cushions. Same process as the seat cushions.


Next, I turned my attention to bolsters. I cut them out to fit some old orange ones I had, sewed them, turned them inside out and stuffed them.


A quick hidden stitch to finish those up, and I tossed them on the new sofa! 


The final step is making sure that some cat deterrent in the form of a sticky clear panel I got off of Amazon, and ensuring a new cat scratch tree is nearby. Check and check.

I shouldn't say "final" as I do still want to add tufting buttons to the back cushions, but that will have to wait for now. Stay tuned!


The cat approves.


If you want to see how this room looked before, check out this post from the gallery wall project.
Thanks for stopping by!