

Back in October, my hubby and I went to the local park and picked up all of the fantastic cones that were falling. So what to do with them? Make a pine cone wreath, of course!

Start with using the clean side of a pizza box, and use 2 large bowls to trace 2 circles.

This circle will serve as the base of your wreath.

Next, separate your cones into their various sizes and shapes.
This will help you later when you are trying to fill holes and/or make the wreath balanced.

Using the glue-gun, start gluing the cones on to the cardboard.
Try to vary the directions; making some cones face out, some face in, and some face down.

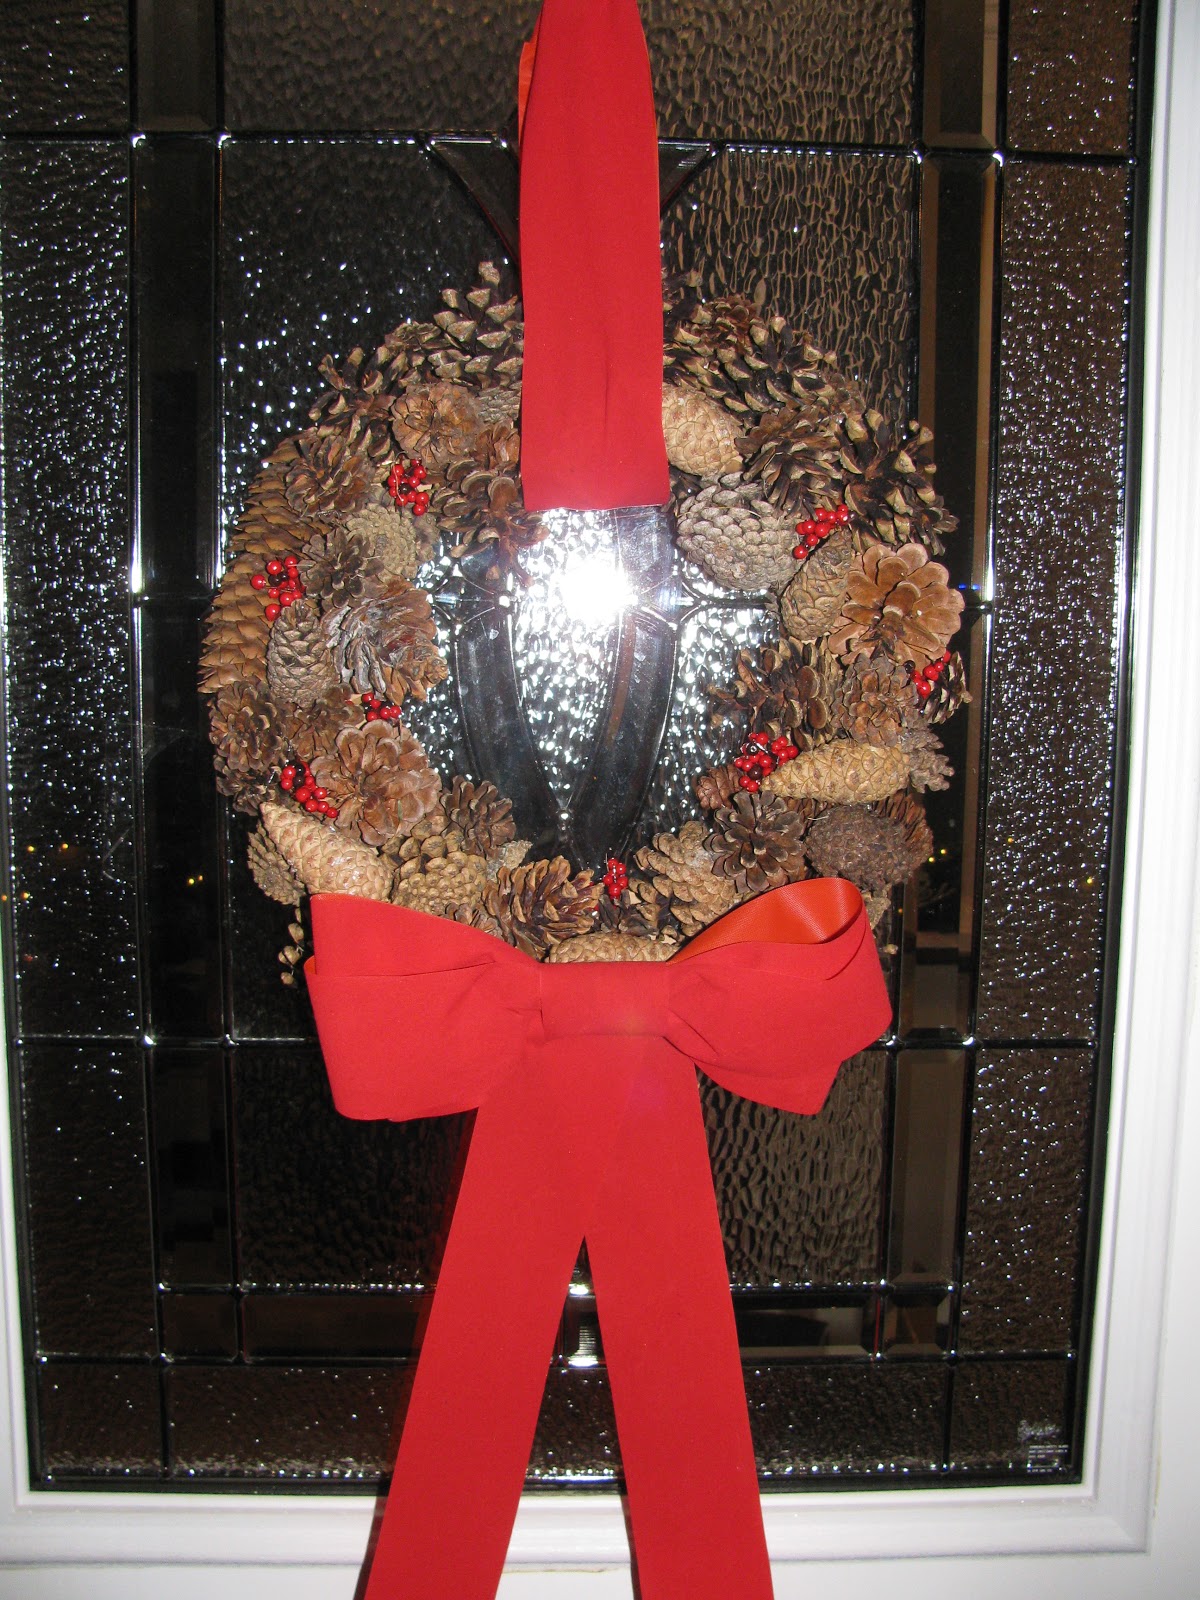
Next, use some velvet ribbon to tie a bow.
It is a lot cheaper than buying one, plus you will have extra ribbon to use as the hanger.

A little embellishment via these holly berries will do the trick.
Cut it into smaller pieces and fill any spots where cardboard might be showing through.

Add the bow to the wreath, as well as the ribbon holder.
Final step is to use a blow-dryer to rid your wreath of the spider-webs left behind by the glue-gun.

Now, just hang and enjoy the natural splendors that Mother Nature has to offer!
Merry Christmas everyone!!
ps. I don't think any pine cone wreath I ever made as a kid looked this good!
Amazing! Santa's definitely stopping at this house.
ReplyDeleteThanks, and I sure hope so!
DeleteUber impressive! It looks great!PatC
ReplyDeleteThanks Pat!
DeleteI did forget one step... to clear spray it.
Clear spray stops the cones and cardboard from warping in the changing outdoor temperatures.
Once I brought it back inside, it did return to its original shape.